
When dental implants were first initiated in 1965, they were placed using a ‘freehand’ technique, where surgeons inserted the implants wherever they found sufficient bone support. The prosthesis was planned only after the implant had already been placed in the bone. Over the years, further innovations introduced new implant designs to ensure proper implant stability, in addition to advanced oral surgery techniques to improve patient recovery, and significantly increase implant stability once it was placed.
Fast forward several decades, where today, the workflow has changed dramatically, and with advent of the newer software, clinicians can now plan the prosthetic work prior to implant placement. But it’s the rise of advanced digital 3D technologies that enables clinicians to place the implant in an optimal position using a surgical guide, now an integral part of the prosthetic planning process.
Bridging the Digital Divide
Digital 3D tools are the cornerstone of guided implant surgery, where clinicians use powerful digital 3D imaging technology to ‘guide’ or assist them in the planning and placement of implants more efficiently, and accurately. A key benefit of digital 3D planning is the ability to create a virtual cast, allowing the clinician to visualize the patient’s occlusion, wax-up and planned final restoration, and in turn, plan the implant positioning accordingly.

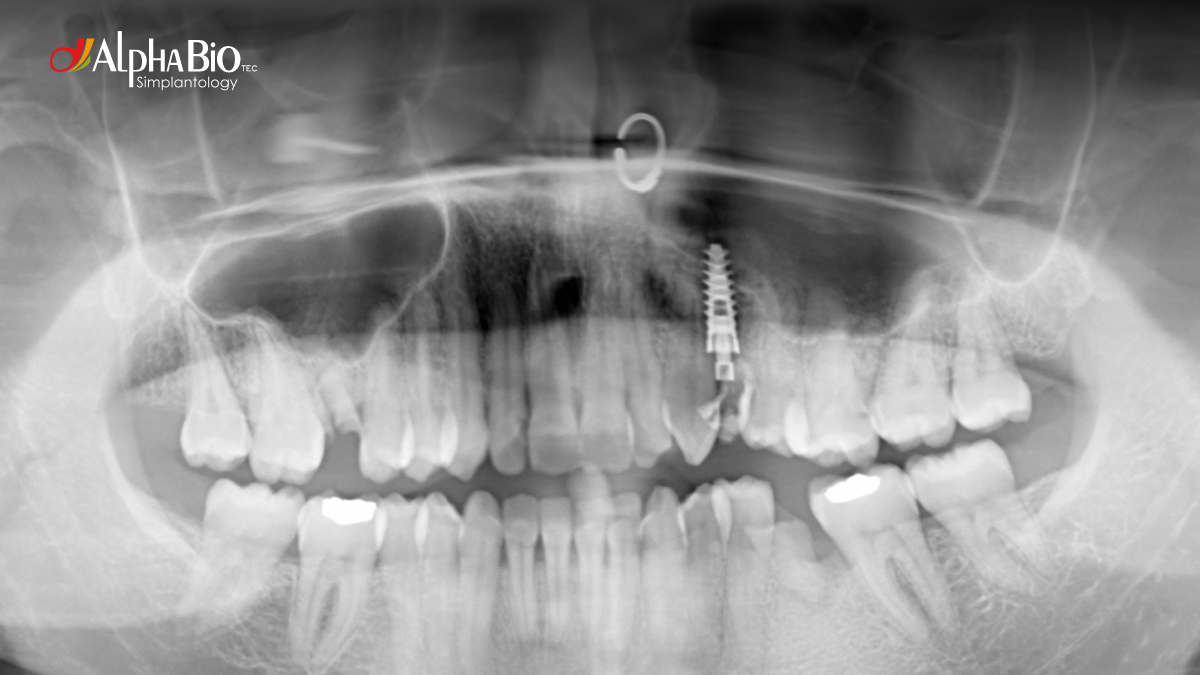
In 1989, Dr. Richard Lazzara showed that implant insertion inside an extraction socket had the same result as in healthy bone. We do know, however, that some bone is lost during the healing process. Today, digital 3D planning software helps clinicians plan the optimal position of the implants, including digital mockups of the prosthetic crowns. In turn, these digital mockups can essentially replace the standard wax-ups previously used. Mockups enable clinicians to digitally expose layers of tissue, and see the exact position of the implant in the bone.
Flapless Surgery
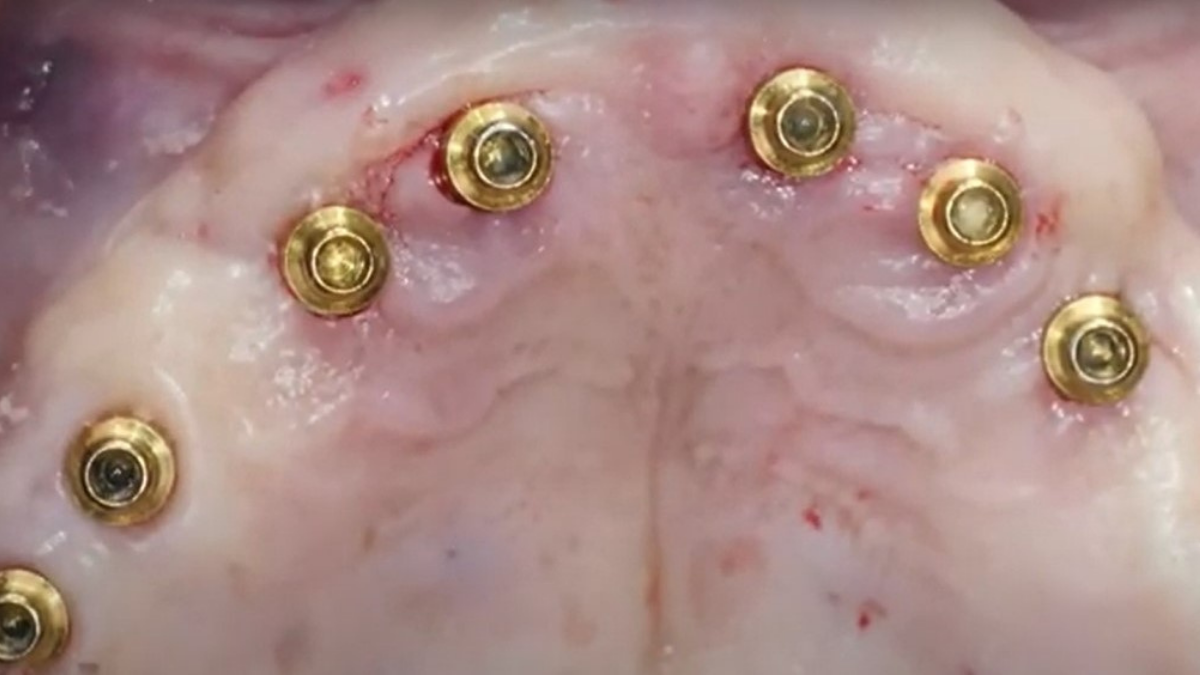
One of the many advantages of guided surgery is the ability to perform implant placement without raising a flap. Referred to as “Flapless Surgery,” this surgical technique offers exceptional benefits to the patient, namely reduced bleeding, no need for sutures, and significantly less chair time. To that end, flapless surgery results in less stress for the tissue, and for the patient. Following are practical tips for successful flapless surgery:
- No need to take off the guide to remove the punched-out tissue
- Use the crestal drill and drill through the excess punched-out tissue. This will remove the tissue and drill the first few millimeters to stabilize the next guided drill.
Use the drills gently, without applying excess force, one step at a time. - When drilling for several implants, always start on one side of the jaw and continue to the other side. To reduce the number of micro-movements from drilling in the guide, it’s advised not to jump from side to side. By maintaining a straight implant placement sequence, the micro-movements will only affect the final implant.
CBCT and Intra-oral Scan
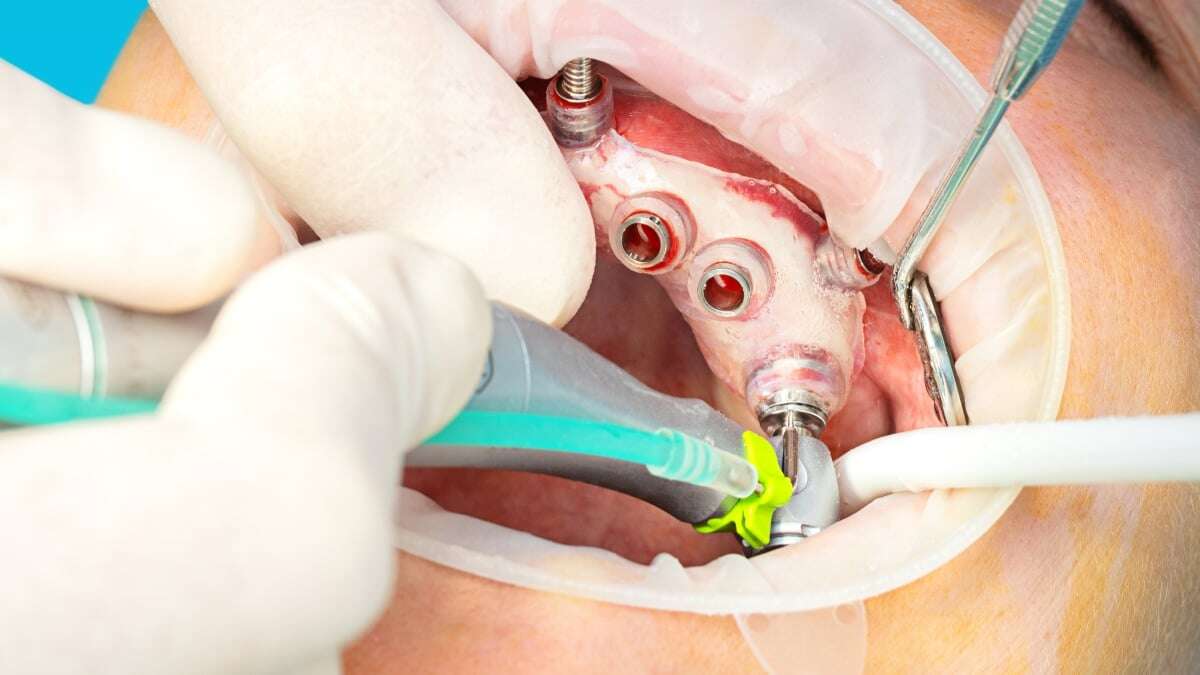
State-of-the-art digital technology can also help clinicians easily match the DICOM file from the CBCT with an intraoral scan of the patient and generate a precise surgical guide. In cases where a single implant is planned, the surgical guide can be based on the digital impression and stabilize the guide on the patient’s teeth.
In edentulous patients, 80% of cases can be treated with guided surgery, however, in this instance, the guide should be stabilized on the patient’s bone. We recommend using a drill to place a lateral pin to fix and stabilize the guide in position during the drilling sequence and implant placement. After removing the guide, adjust the tissue and immediately load the implants with a provisional prosthesis, with or without a titanium bar.
If an intraoral scanner isn’t readily available, the “Double Template Technique” is a proven means of still being able to replace failing natural teeth with an aesthetic implant-supported restoration, all in a single surgery. This technique is based on two surgical guides planned simultaneously, sharing the same lateral pin positioning, whereby one implant is planned in common in both guides as a “reference implant.”
We recommend to start the protocol with a CBCT scan to analyze the bone and start planning the implants to better understand if immediate loading is a possible option. After the first guide is used to place the reference implant, the remaining teeth can be extracted, while using the second guide, the stabilizations pins and the single implant placed as a reference. This technique enables placement of a highly aesthetic provisional restoration at the end of the surgery, with a good fit of the restoration to the post-extraction gingival tissue.
Following are practical tips for a successful Double Template procedure:
- Stabilization pins may look invasive, but never try to save time by not using them, especially in cases with numerous missing teeth
- By using lateral and lingual pins, you can achieve correct guide positioning, proper support, and stability for precise implant placement
- Assess the precision of implant placement with a surgical guide when placing the provisional or final restoration. Slight adjustments may be required, but overall, the restoration should be placed easily.

The Merits of All Things Digital
Indeed, in some cases, when presenting with perfect bone condition, one might be compelled to ask, “Why use guided surgery?” The answer is clear. We now know that with guided surgery, we can essentially plan a gentler approach, with less stress to the patient, and with far greater precision. This approach can also be valuable in the treatment of phobic patients, as digital planning allows us to complete the entire treatment workflow – extractions, implant placement, and a provisional prosthesis, all in a single visit.
To that end, digital planning and guided surgery can help clinicians provide a dramatic change to the patient, often within the same day. Take a photo of the patient prior to treatment, and again, after loading the newly placed implants with a restoration. You and your patient will not only see a marked improvement in their smile, but also genuine satisfaction from a remarkably fast, effective, and long-lasting digitally powered workflow.