In implant dentistry, the greatest challenge for both the clinician and the patient is bone loss, as bone substitution or GBR (Guided Bone Regeneration) requires multiple surgeries, results in pain and discomfort, additional chair time, and costs.
As a functional aesthetic dentistry and cosmetic dental specialist, during my years of practice, I have dealt with the high demands and equally high expectations of patients, many of which are very critical. To meet patients’ needs, I must focus on the smallest of details, so that at the end of the treatment, we will have achieved the results our patients require. We have to consider patients’ needs from the moment treatment begins.
My approach is tissue-responsible dentistry, and it involves several advanced concepts in both hard and soft tissue management in implant dentistry. From my perspective, we should focus not only on the implant itself, but also on tissue management surrounding the implant, and clearly define the restoration as well as its function.
How then can we address minimally invasive surgical procedures for implantology, and show that it’s exceedingly easier to preserve dental tissues rather than reconstructing them? These and other questions are answered below, in addition to considering prosthetic solutions as well.
Reconstructing Lost Tissue Volume in an Edentulous Site
To best understand reconstruction techniques in an edentulous site, it’s important to recognize the three different types of extraction sockets, particularly in the anterior dentition:
- Type 1 – An intact socket with intact cortical plate and soft tissue
- Type 2 – Dehiscence of the bone wall, however the soft tissue is present
- Type 3 – Both the hard and soft tissue are missing
It’s equally important to distinguish between the various timing of implant placement, as defined by Prof. Daniel Buser in the “ITI Treatment Guide”:
- Immediate Implant Placement – Placing the implant on the same day of the extraction
- Early Placement – With soft tissue healing, 4-8 weeks after an extraction, or with partial bone healing, 3-4 months after an extraction
- Late Placement – In most cases requiring GBR, a waiting period of 6 months or more is required, and would be considered late implant placement

In cases where the buccal plate is completely missing after an extraction, research and studies cite clear and detailed recommendations, to perform GBR with a 7-10 month waiting period.
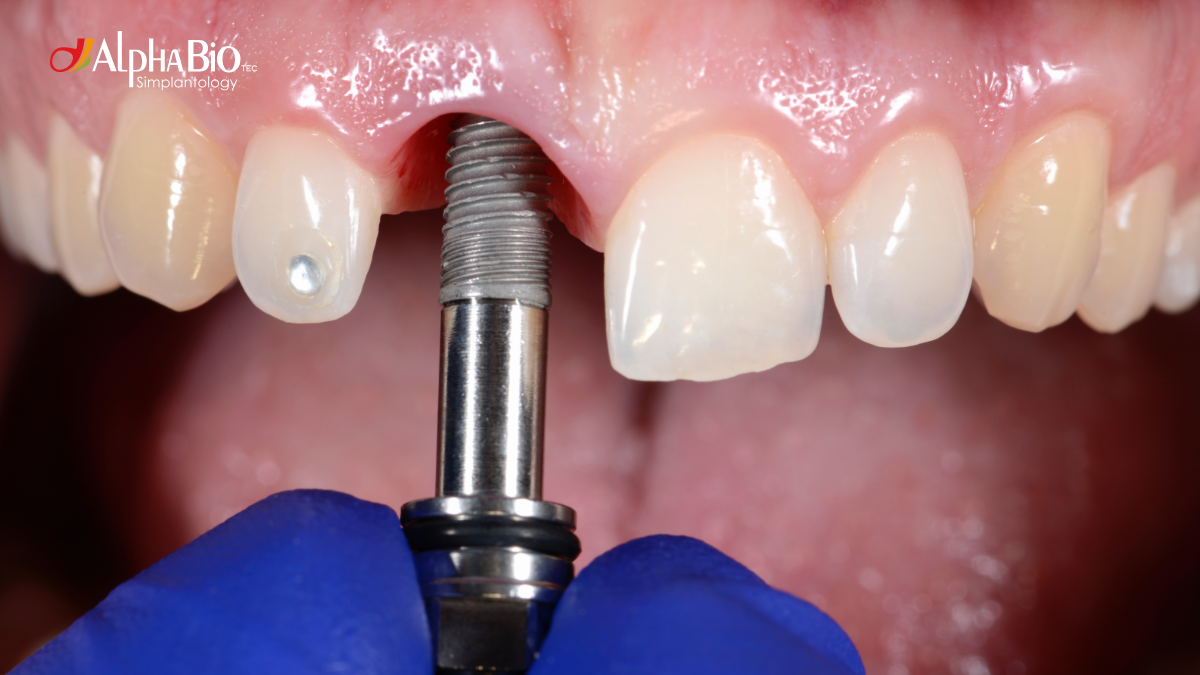
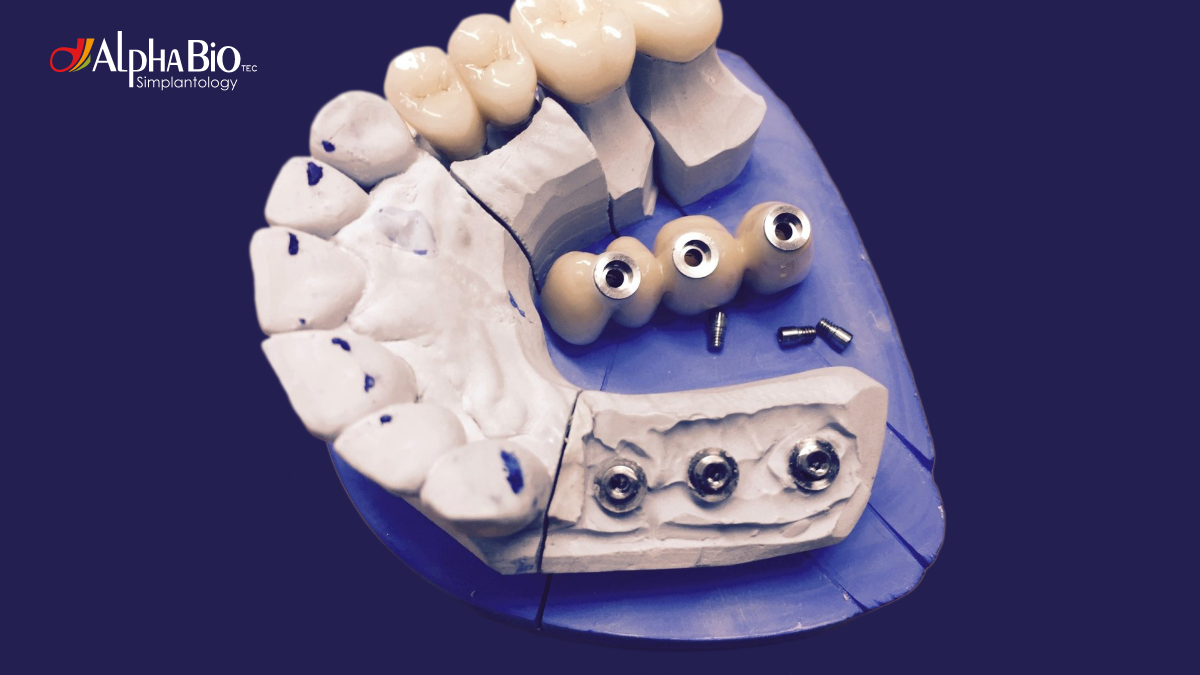
During this period, the patient is provided with an anatomic pontic designed to shape the tissue underneath. An implant is then placed with a CAD/CAM immediate temporary crown, which will shape the correct emergence profile of the soft tissue. Keep in mind that it’s critical to have a favorable concave emergence profile. If you’re satisfied with the shape and tissue contouring of the temporary crown, it can be duplicated to create a CAD/CAM hybrid crown. 99% or more of my cases are restored with these one-piece screw-retained crowns.
Minimally Invasive Implantology: The Concept
To best understand what ‘powers’ minimally invasive implantology, we have to first understand the biology behind the extraction. In anterior upper and lower teeth, we have very thin cortical plates that receive their blood supply from the tissues on their outer side as well as from the periodontal ligament. When a tooth is extracted, we remove the periodontal ligament and the blood vessels that supply the cortical plate. It’s therefore essential ‘not’ to raise a buccal flap whenever possible, to preserve the blood supply to the bone, at least partially. In this instance, the bone resorption process at the site would be considerably fast. Remember, the more time wasted after extraction – the more tissue will be lost.
How then can we decrease or ultimately, avoid bone loss? The answer would be immediate implant placement right after the extraction. There are specific rules for implant placement in the extraction socket that should be followed. First, you have to penetrate the palatal wall coronally to the location of the original tooth’s apex. Then, you would go deeper, follow with an osteotomy, and finally, you are able to place the implant palatal and apical to the extraction site. This way, you can deliver a distance of 2-4 mm between the cortical plate and the implant surface. To achieve optimal results, it’s recommended that you use a reliable implant system with good primary stability. A good example is the MultiNeOTM implant system from Alpha-Bio Tec.
According to Prof. Tomas Linkevicius’s concept of “Zero Bone Loss,” connective tissue can prevent the resorption of bone tissue. In cases where dehiscence of the buccal plate can occur, we would take a connective tissue graft and place it into the gingival pouch. Following a few weeks of healing, we would see the improved buccal soft tissue profile.
A multicenter study compared the results between four groups of patients, where implants were placed with healing abutments or immediate temporary crowns, and with or without bone fillers. The results showed that the best performance and the least change of the buccolingual dimension, with less hard and soft tissue collapse and less recession, occurred in patients who received both a bone filler and an immediate temporary restoration. This is because a temporary restoration provides proper closure of the implant site, stabilizing the blood clots and the soft tissue. Based on these exemplary results, I use and therefore recommend immediate temporary restoration whenever possible.
Specific Cases and Recommended Techniques
In cases where the buccal plate is missing, you can use the socket shield technique, with a partial extraction of the tooth. Essentially, you split the tooth, leaving the buccal portion of the root in the socket, and place the implant palatally. In my practice, for surgeries, I always use PRF (Platelet-rich Fibrin). In a CBCT, six months after the extraction, you’ll be able to see that the implant is placed in a prosthetically-correct position, protected by the socket shield. This technique can also be referred to as the Dual Zone Concept, as you preserve the blood supply to the bone from both the periodontal ligament and the buccal soft tissue.
The most common complications using this technique can be either a loose socket shield after extraction or an exposed shield. If the socket shield is loose, you would then need to remove the shield and still place the implant, or alternatively, choose delayed implant placement and wait until the area is fully healed. If the complication is that the shield is exposed, in this instance, you will need to submerge the implant deeper into the socket. This is why it’s particularly important to have a screw-retained temporary crown, as you can then remove the crown, remove the loose shield, and place the crown in its original position to enable tissue healing.

In some cases, you may have a thin cortical plate, however, there is also an apical narrowing of the bone. Even when you don’t intend on placing an implant after the extraction, in this scenario, it is still recommended to leave the buccal portion of the tooth as a shield to enable proper tissue support and emergence profile for the pontic.
Further, in cases where you have a few residual teeth remaining and adjacent bone that has to undergo GBR, where later, you plan to place implants in both the extraction socket and the GBR zone, you can use the Submerged Root Technique. Instead of extracting a tooth in a location where no implant would be placed, you can leave the tooth submerged in the bone, which would preserve the bone ridge width after implant placement. Leaving the root would leave its periodontal ligament and retain the bone in a far better shape, with very stable and aesthetic results.
In my practice, when I want to determine the implant placement according to the bone volume, I use and strongly recommend guided surgery. Guided surgery is exceedingly safer for the clinician and for the patient. With guided surgery, after dissecting the root in the extraction process, I leave the shield in the socket and shape it. Only then would I place the surgical guide, and then make the osteotomy in the predetermined position and place the implant through the guide.
An additional recommended tool is the Osseo-densification Kit to enable bone condensation around the osteotomy. This technique yields excellent results by creating improved bone quality, increased primary stability and the amount of bone around the implant.
On a final note, while dental implants are widely considered to be among dentistry’s greatest modern advances, as effective as they are, implants are not recommended for every case, as we know there needs to be sufficient bone for implants to be placed. Despite being the most successful tooth replacement system to date, we must strive to achieve minimally invasive implantology procedures to better serve our patients – minimum pain and discomfort, decreased chair time, and ultimately, lower costs. With tissue-responsible dentistry, the practice of tissue management surrounding the implant, we can understand that indeed, it’s much easier to preserve dental tissues than to reconstruct them.